|
|
 WinDeveloper Coin Tracker
Getting Started with the Coin TrackerWe only need a few minutes to get the WinDeveloper Coin Tracker ready to run. Here we walk through the installation, coin selection, asset configuration and off we go. The basic idea is to bring all our cryptocurrencies under one roof. We might be using multiple crypto exchanges. We might have a mix of online and offline wallets. All will have their own interface and their multi-step authentication procedure. Having to logon to each of these becomes a burden. Staying logged in to avoid re-authentication, is a security risk. So here comes the Coin Tracker, a tool that does all the monitoring without any logins. Running the Coin TrackerGet the Coin Tracker for FREE from the WinDeveloper Download page. For the moment only a Windows Desktop version is available. You can run it on any Windows 10, 8.1, 8 or 7 machine. To install, we run the downloaded executable and click our way to the end with Next, Next, Next. On launching the Coin Tracker we land at the Trade page. This will show some default coins together with their price information as retrieved from a number of crypto exchanges. In this first release two exchanges are supported, but we plan to support more.
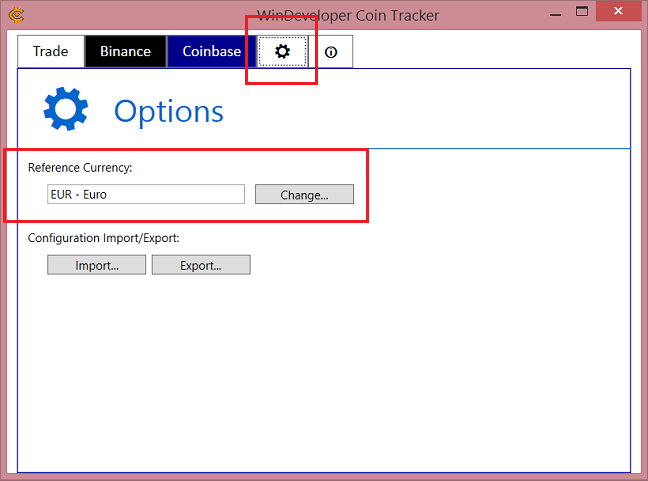
For the moment refrain from changing anything here. Instead let's move to the Options page to configure something important. Click on the cogwheel icon at the top.
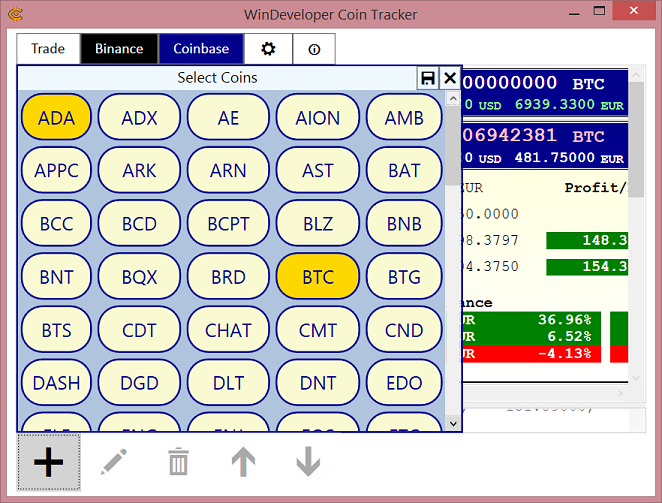
We need to set the reference currency. This will be the currency in which we configure our assets. Click Change and select your preferred currency. With the default currency out of the way, we can go back to the Trade page. Click the top leftmost button. It is now time for us to configure the coins we want to monitor. Click the plus (+) button at the bottom.
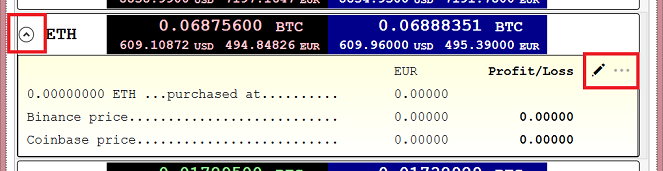
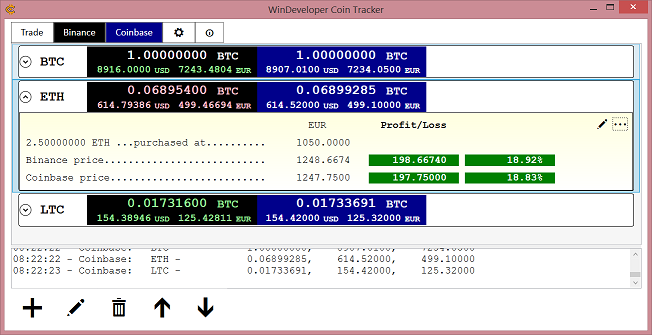
At the coin selection dialog, we select all the coins that interest us and clear those we don't want to follow. Close the dialog by clicking the + again or the Save button at the top. The trade view will be updated with the set of selected coins. In a few seconds their price information will start being refreshed. Click a coin to toggle its expanded state. When expanded we see the profit/loss being made. Initially everything is zero. The image below highlights the control buttons for working with a coin.
Here we are working with Ethereum (ETH). At the top we have the price information for ETH as retrieved from two different crypto exchanges. This gives us slightly different quotations side-by-side. On the right hand we have two buttons. The first is for Editing and the second is to further expand the coin information. Indeed we have two levels of expansion, allowing us to control the level of detail shown. Since we haven't yet configured any owned assets the second button is disabled, but we will see this in action shortly. Click the Edit button to configure how much ETH we own.
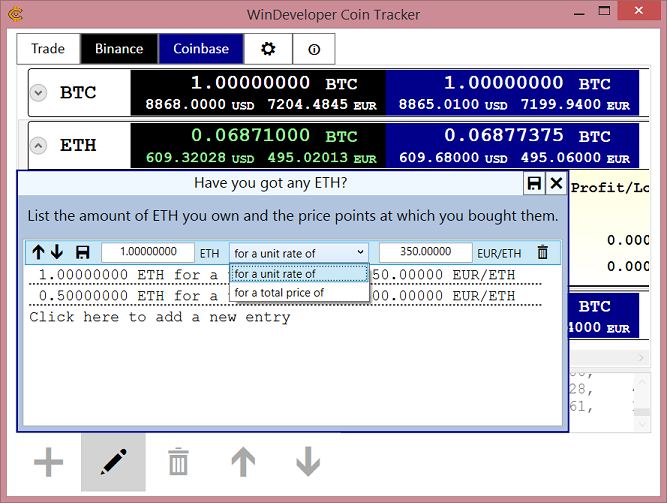
Clicking on 'Click here to add a new entry' creates a new list entry. Here we fill-in the amount of ETH and its price. When specifying prices we could be working with our purchase price or (where applicable) an estimate of how much it costed us to mine it. We can add multiple entries for the same coin. This makes sense when acquiring the same coin multiple times at different prices. The Trade page will then show us how each of these is performing. Note how the prices shown here are in Euros because that is our default currency setting. Note also how each list entry includes a number of buttons. On the left we have the Up/Down Arrow and the Save button. On the right we have the Delete button. The arrows allow us to order the list items. Save will complete editing the item. Delete will remove a list item altogether. Finally we again click the Edit button at the bottom to save changes to our asset list. The coin expanded state will now show profit/loss information for our assets. Here we can see the total amount of ETH and the profit/loss based on the current spot-price quotations.
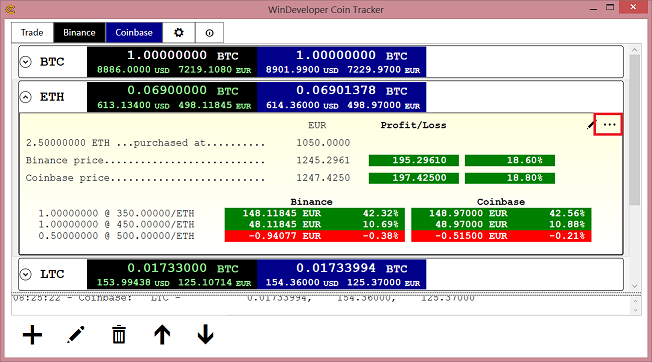
Expanding further the view we can also see profit/loss for each configured price point.
We can now repeat the same steps for the other coins that interest us. Once configured we can easily import/export our configuration and replicate the same settings to other machines. This is done from the Options page from where the Reference Currency is configured. More Control, More SecureToday we could easily be managing crypto assets that are worth a lot in terms of our legacy currencies. Security is always a top concern and one good practice is that of minimizing access to the wallets holding them. Listing our assets at the Coin Tracker greatly reduces the need for us to login to our wallets/exchanges. Users no longer need to keep their crypto exchange interface open just to monitor prices. Indeed we now only need to access our wallets when spending, or trading the coins. All product and company names herein may be trademarks of their respective owners.
|